Thursday, February 26, 2009

can't have too much of a good thing!


Yes, that's Turbo--he came to stay when eldest son Eric went to Santa Barbara to visit his girlfriend.


Jane had never met him before and is no doubt wondering just how many pigs are there??


Well, pigs are kind of like quilt patterns...you can't have too many.

So in that spirit, from now until March 15, for every Late Bloomer Quilts pattern you order, you can receive a second of equal or lesser value for 50% off! When you send in
your order form, just adjust your $$ amount.

P.S. You've probably noticed the black work shoes in the background (how could you not? They're HUGE). When middle son Nick gets home from work, he's just too exhausted to do anything more than kick them off in the middle of the living room. He's a part-time checker at our local grocery store so you can imagine how tiring such physical labor would be for a strapping 19 year old. (Insert eye roll here)

Sunday, February 22, 2009

Hey, let's make a quilt!


This is a really easy project--it's a great way to practice your machine applique skills and the piecing really couldn't be more basic.

I used scraps and pieces of vintage sheeting I had lying around--didn't have to buy a thing.


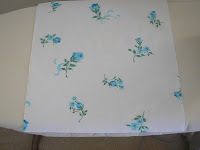
Start by cutting out a 15 1/2" square. This will be trimmed down after you're finished with the applique.

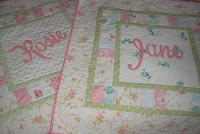
Now you'll need to plan your applique. If you're reading this, you have a computer, so just hop on over to your word processing program and pick out a font that you like. The simpler the better, especially if you're new to this. You'll need to enlarge the font--and I can't tell you the amount since it all depends on the font. Just keep printing out your word until it's the right size to fit neatly into your square (keep in mind the finished size of that square will be an inch smaller). Oh, and yes, because I'm a spaz with my camera, the backwards letters shown are actually for ROSIE, even tho I'm showing you JANE's quilt!


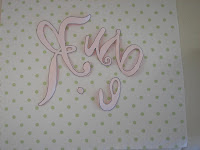
Print out your letters, flip the paper over and trace the reverse side of the letters.
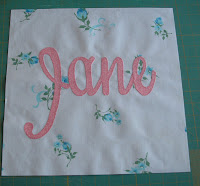
Next, trace the outline you just created onto lightweight fusible web. Fuse the letters onto the wrong side of your chosen fabric and cut them out. Peel off the paper backing and fuse onto the right side of your 15 1/2" square.

Machine blanket stitch around all letters.

If you'd like more in depth instructions on this part, there's a book I can recommend!


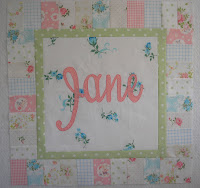
Admire your beautiful work and trim the square to measure 14 1/2".


Cut out 2 strips of fabric 1 1/2" wide for the inner border. Crosscut into 2 strips 14 1/2" long and 2 strips 16 1/2" long. Stitch to the sides of the square and then to the top and the bottom, pressing toward the border strips.


From scraps, cut a total of (38) 2 1/2" x 3 1/2" rectangles. Stitch them together, along the 3 1/2" sides, making 2 strips of 8 units each and 2 strips of 11 units each, pressing toward the darker prints.
Stitch to the sides then top and bottom, pressing toward the inner border.


Measure your quilt top from top to bottom across the center and cut 1 1/2" strips to that measurement. Stitch to each side and press toward the strips.
Measure from side to side and cut 1 1/2" strips to that measurement and stitch to the top and bottom.


For the outer border, repeat this process with 5" wide cut strips.


Layer, baste and quilt. Bind with 2 1/4" strips of fabric and make your dog* very happy!


* I suppose you could make one of these for an actual person...maybe a baby? You can also keep adding borders until it's just the right size for you to snuggle up under.

If you make one, please send me a photo so I can share it!

Monday, February 16, 2009

A friend is...


someone who shames you into finishing an old project that really should have been done months ago...(I'm so happy with the way it turned out--Kay's patterns are terrific!)


and then introduces you to a new project you just can't put down!


This little friend needs to learn that my yarn may look an awful lot like a rope toy, but
if you want to play fetch, that's not the item to bring to Mom!

Next up, quilts!!
REALLY!

Wednesday, February 11, 2009

Piggie Post


I've received quite a few questions regarding my little roommate Melvin so I think it's about time to set the record straight on a couple of details.

First of all, as you can see from the official international news story I have linked for you, it is apparently quite common in other parts of the world for guinea pigs to wear clothing. Granted, this fellow probably has to endure harsher winters than Melvin does, but still.

Here's how pigs look in Peru...and yes, I do know what happens after they're displayed in their costumes
but Melvin doesn't, so please don't leave any comments about it, ok?

Melvin does not mind his outfits--the only problem is that he's a wee bit chubby now and they really are a little snug. There's one suit you haven't seen yet and that's because until I can find someone who specializes in plus size guinea pig garments, Melvin will be stuck wearing hats.

So yes, that means that I do not make his clothes. See if you can follow my reasoning on this: For me to make guinea pig clothes would be crazy. The fact that I have found someone who actually specializes in such items means that I can dress up my pig AND support someone's home-based business and what could be better than that??

Melvin is a terrific companion while I sew. He likes to talk and play with his ball...and you've never seen anyone enjoy an empty toilet paper tube like he does.
He's cuddly, he gives kisses (even ask Pam!)and unlike other household animals I could mention, I've never once tripped over him.

So now you've seen him as he is most days--showing off his gorgeous auburn coat.
And I'll leave you with his philosophy--which I remind myself of every time I'm in front of that window ironing:

Monday, February 09, 2009

Spring really is coming (achoo!)


Can nests and eggs be far behind?


Newer›  ‹Older